Spring Boot Testing Strategy – Context Management & Perf Secrets (Part 2)
Table of Contents
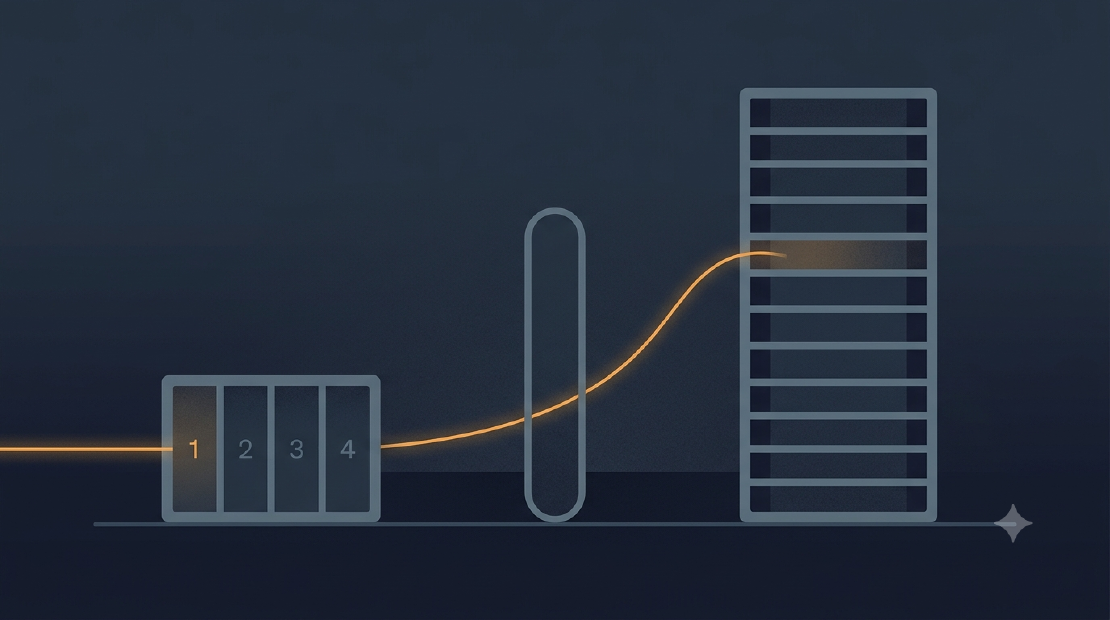
Every second saved in test execution multiplies across your entire team and CI/CD pipeline. A 10x improvement in test performance can save hours of developer time daily—transforming a 10-minute test suite into a 1-minute feedback loop.
The culprit? Poor context management—the #1 cause of slow Spring Boot test suites.
The Problem: What Makes Spring Tests Slow?
The Innocent-Looking Test:
@SpringBootTest
class UserServiceTest {
    @MockBean EmailService emailService;
    // Startup time: 5 seconds
}

@SpringBootTest
class OrderServiceTest {
    @MockBean PaymentService paymentService;
    // Startup time: Another 5 seconds (new context!)
}
Each @SpringBootTest loads a complete Spring application context: component scanning, bean initialization, auto-configuration, database connections, caching setup, and security configuration.
Time cost: 2-10 seconds per unique context—multiply that by 100 test classes and you’re waiting 8+ minutes just for startup.
The Solution: Spring’s Context Cache
Spring caches application contexts and reuses them across tests with identical configurations. Any difference in configuration creates a new context.
Think of Spring’s context cache like a HashMap<ConfigFingerprint, ApplicationContext>:
// Simplified mental model
Map<String, ApplicationContext> cache = new HashMap<>();

// When Test1 runs:
String key1 = hash(SpringBootTest + MockBean[EmailService]);
cache.put(key1, newContext);  // 5 seconds

// When Test2 runs:
String key2 = hash(SpringBootTest + MockBean[EmailService, PaymentService]);
// key1 != key2 → Cache MISS → Create new context (5 seconds)

// When Test3 runs:
String key3 = hash(SpringBootTest + MockBean[EmailService, PaymentService]);
// key3 == key2 → Cache HIT → Reuse context (instant!)
How it works visually:
graph TD
    A[Test Class #1 Starts] --> B{Context Exists<br/>in Cache?}
    B -->|No| C[Create New Context<br/>5 seconds ⏱️]
    B -->|Yes| D[Reuse Cached Context<br/>Instant ⚡]
    C --> E[Store in Cache]
    E --> F[Run Tests]
    D --> F

    style D fill:#90EE90
    style C fill:#FFB6C1
Diagram: Spring context cache decision flow showing cache hit (instant) vs cache miss (5 seconds)
Understanding Spring Context Uniqueness: What Triggers New Context Creation?
Spring builds the cache key from your test configuration: @SpringBootTest settings, @MockBean instances, @TestPropertySource values, @ActiveProfiles, @Import configurations, and context initializers.
⚠️ The @MockBean Trap:
Each @MockBean creates a new mock instance with a unique object reference. Even if two tests mock the same service, Spring sees different objects → different cache keys → separate contexts.
@SpringBootTest
class Test1 {
    @MockBean EmailService emailService;  // Mock Instance A
}

@SpringBootTest
class Test2 {
    @MockBean EmailService emailService;  // Mock Instance B (DIFFERENT object!)
}

// Result: 2 separate contexts created (10 seconds total startup)
Solution: Shared @TestConfiguration
Create mock beans once and share them across all tests:
@TestConfiguration
public class SharedMockConfig {
    @Bean @Primary
    public EmailService emailService() {
        return mock(EmailService.class);  // Created ONCE
    }
}

@SpringBootTest
@Import(SharedMockConfig.class)
class Test1 { }  // Uses shared config

@SpringBootTest
@Import(SharedMockConfig.class)
class Test2 { }  // Reuses SAME context (instant!)

// Result: 1 context created (5 seconds startup) - 50% faster!
Performance Impact: N tests with @MockBean = N × 5 seconds. N tests with @TestConfiguration = 1 × 5 seconds.
Monitoring and Measuring Context Cache Performance
Track your context cache statistics to verify optimization efforts are working and identify bottlenecks.
Enable context cache logging to see what’s happening:
# application-test.yml
logging:
  level:
    org.springframework.test.context.cache: DEBUG
After running tests, look for:
Spring test ApplicationContext cache statistics:
[DefaultContextCache@2f943d71 size = 3, maxSize = 32,
 parentContextCount = 0, hitCount = 45, missCount = 3]
Understanding the statistics:
| Metric | Meaning | Good Value |
|---|---|---|
| size = 3 | Currently 3 different contexts cached | Lower is better (more reuse) |
| maxSize = 32 | Maximum contexts that can be cached | Increase if cache overflows |
| hitCount = 45 | Times a context was REUSED | Higher is better |
| missCount = 3 | Times a NEW context was created | Lower is better (each miss = 3-5s) |
Target Ratio: hitCount should be 10x+ higher than missCount
Example: 45 hits / 3 misses = 15x ratio ✅ Excellent context reuse!
Warning Signs:
missCount≈ number of test classes → No context reuse ❌sizeapproachingmaxSize→ Need to increase cache or reduce unique configs
Mastering @DirtiesContext: Strategic Usage and Performance Impact
@DirtiesContext tells Spring: “This test polluted the context (modified beans, changed state), so discard it and create a fresh one for the next test.”
// # Aggression Levels (from least to most aggressive):

// Level 1: Method-level AFTER_METHOD - Surgical precision 🎯
@SpringBootTest
class OptimizedTest {
    @Test
    void normalTest1() { /* Uses cached context */ }

    @Test
    @DirtiesContext  // Mark context dirty AFTER this specific test
    void testThatModifiesState() {
        singletonService.modifyGlobalState();
    }

    @Test
    void normalTest2() { /* Gets FRESH context */ }
}
// Impact: Only 1 context refresh (after the dirty test)

// Level 2: Method-level BEFORE_METHOD - Fresh start 🔄
@Test
@DirtiesContext(methodMode = MethodMode.BEFORE_METHOD)
void testNeedingFreshStart() { /* Gets FRESH context BEFORE this test */ }
// Impact: 1 context refresh before this test

// Level 3: Class-level AFTER_CLASS - Whole class cleanup 🔥
@SpringBootTest
@DirtiesContext(classMode = ClassMode.AFTER_CLASS)
class DatabaseMigrationTest {
    @Test void test1() { }
    @Test void test2() { }
}
// Impact: 1 context refresh per test class

// Level 4: Class-level AFTER_EACH_TEST_METHOD - Maximum isolation 💥
@SpringBootTest
@DirtiesContext(classMode = ClassMode.AFTER_EACH_TEST_METHOD)
class StatefulServiceTest {
    @Test void test1() { }  // Context discarded after
    @Test void test2() { }  // Fresh context, then discarded
}
// Impact: N context refreshes for N tests (SLOWEST!)
Performance Impact Summary:
Method AFTER (selective) < Method BEFORE < Class AFTER_CLASS < Class AFTER_EACH_TEST_METHOD
     5 seconds             5 seconds         5 seconds            N × 5 seconds
Smart Alternatives to @DirtiesContext: Faster Test Cleanup Strategies
The biggest mistake: Using @DirtiesContext when simpler alternatives exist.
graph TD
    A["What type of pollution?"] --> B["Database state"]
    A --> C["Cache / Memory state"]
    A --> D["@Value properties"]
    A --> E["Singleton bean state"]
    A --> F["Major config change"]

    B --> B1["✅ Use @Transactional + @Rollback"]
    C --> C1["✅ Provide reset() methods"]
    D --> D1["✅ Use ReflectionTestUtils"]
    E --> E1["⚠️ Method-level @DirtiesContext"]
    F --> F1["❌ Class-level @DirtiesContext"]

    style B1 fill:#90EE90,stroke:#333,stroke-width:1px
    style C1 fill:#90EE90,stroke:#333,stroke-width:1px
    style D1 fill:#90EE90,stroke:#333,stroke-width:1px
    style E1 fill:#FFD700,stroke:#333,stroke-width:1px
    style F1 fill:#FFB6C1,stroke:#333,stroke-width:1px
Diagram: Decision tree for choosing the right alternative to @DirtiesContext based on pollution type
Alternative #1: Database Cleanup → Use @Transactional
// ❌ SLOW: Recreates entire context
@Test
@DirtiesContext  // 3-5 second penalty
void testUserCreation() {
    userRepository.save(new User("test@example.com"));
}

// ✅ FAST: Transaction rollback
@Test
@Transactional  // Wraps test in transaction
@Rollback       // Rolls back after test (default behavior)
void testUserCreation() {
    userRepository.save(new User("test@example.com"));
    // Automatically rolled back - database clean for next test
}
💡 Why both @Transactional and @Rollback?
@Transactionalalone defaults to rollback@Rollbackmakes the intent explicit (documentation)- Can use
@Rollback(false)when you DO want to commit - Best practice: Use both for clarity
Alternative #2: Cache/Memory Cleanup → Provide Reset Methods
// ❌ SLOW: Recreates context
@Test
@DirtiesContext
void testWithCache() {
    cacheService.putInCache("key", "value");
}

// ✅ FAST: Reset only what changed
@Service
public class CacheableService {
    private final Map<String, Object> cache = new HashMap<>();

    public void clearCache() {  // Provide reset method
        cache.clear();
    }
}

@Test
void testWithCache() {
    cacheService.putInCache("key", "value");
    // assertions...
    cacheService.clearCache();  // Reset without context refresh
}

@AfterEach
void cleanup() {
    cacheService.clearCache();  // Or clean up after each test
}
Alternative #3: @Value Properties → Use ReflectionTestUtils
@Component
public class PaymentProcessor {
    @Value("${payment.max-retry-count}")
    private int maxRetryCount;  // Default: 3

    public boolean processPayment(Payment payment) {
        for (int i = 0; i < maxRetryCount; i++) {
            // Retry logic
        }
    }
}

// ❌ SLOW: Recreate context to change property
@Test
@DirtiesContext
@TestPropertySource(properties = "payment.max-retry-count=5")
void testWithDifferentRetryCount() {
    // Test with 5 retries
}

// ✅ FAST: Modify field directly using reflection
@Test
void testWithDifferentRetryCount() {
    ReflectionTestUtils.setField(
        paymentProcessor,      // Target object
        "maxRetryCount",       // Field name
        5                      // New value
    );

    // Test with 5 retries - no context refresh needed!
    assertTrue(paymentProcessor.processPayment(payment));
}

@AfterEach
void resetToDefault() {
    ReflectionTestUtils.setField(paymentProcessor, "maxRetryCount", 3);
}
When to use ReflectionTestUtils:
- ✅ Testing different @Value configurations without context reload
- ✅ Modifying private fields for testing
- ✅ Injecting test doubles into private dependencies
- ⚠️ Use sparingly - indicates potential design issue if overused
Essential Patterns for High-Performance Test Suites
Goal: Master the patterns that enable consistent, fast, maintainable test suites.
Pattern #1: Shared @TestConfiguration
Problem: @SpringBootTest loads the entire application (slow).
Solution: Use test slices to load only what you need.
Step-by-Step Implementation
Step 1: Identify Common Mocks
Look through your test classes and find mocks that appear in multiple tests:
// Test 1
@SpringBootTest
class UserServiceTest {
    @MockBean EmailService emailService;  // ← Common
    @MockBean PaymentService paymentService;  // ← Common
}

// Test 2
@SpringBootTest
class OrderServiceTest {
    @MockBean EmailService emailService;  // ← Common
    @MockBean PaymentService paymentService;  // ← Common
}

// Test 3
@SpringBootTest
class InvoiceServiceTest {
    @MockBean EmailService emailService;  // ← Common
    @MockBean PaymentService paymentService;  // ← Common
}
Step 2: Create Shared Configuration
@TestConfiguration
public class SharedMockConfig {

    @Bean
    @Primary  // Replaces real EmailService bean
    public EmailService emailService() {
        EmailService mock = mock(EmailService.class);

        // Define DEFAULT behavior for ALL tests
        when(mock.send(any())).thenReturn(true);
        when(mock.isAvailable()).thenReturn(true);

        return mock;  // SAME instance for all tests
    }

    @Bean
    @Primary  // Replaces real PaymentService bean
    public PaymentService paymentService() {
        PaymentService mock = mock(PaymentService.class);

        when(mock.processPayment(any()))
            .thenReturn(new PaymentResult(true, "TEST-TXN-123"));

        return mock;
    }
}
Step 3: Import in Tests
@SpringBootTest
@Import(SharedMockConfig.class)
class UserServiceTest {
    @Autowired EmailService emailService;  // Gets shared mock
    @Autowired PaymentService paymentService;

    @Test
    void testUserCreation() {
        // Uses default mock behavior
    }

    @Test
    void testCustomBehavior() {
        // Can override for specific test
        when(emailService.send(any())).thenReturn(false);

        // Test failure scenario
    }
}

@SpringBootTest
@Import(SharedMockConfig.class)
class OrderServiceTest {
    @Autowired EmailService emailService;  // SAME shared mock
    @Autowired PaymentService paymentService;

    @Test
    void testOrderProcessing() {
        // Uses default mock behavior
    }
}
📊 Performance Impact:
BEFORE (with @MockBean):
├─ UserServiceTest:    5 seconds (new context)
├─ OrderServiceTest:   5 seconds (new context)
└─ InvoiceServiceTest: 5 seconds (new context)
Total: 15 seconds

AFTER (with SharedMockConfig):
├─ UserServiceTest:    5 seconds (new context created)
├─ OrderServiceTest:   instant (context reused)
└─ InvoiceServiceTest: instant (context reused)
Total: 5 seconds (66% faster!)
Pattern #2: Configuration Inheritance Hierarchy
Problem: Duplicating test setup across multiple test classes.
Solution: Create a base test class with common configuration.
The Three-Level Architecture
Complete Three-Level Test Architecture (click to expand)
// 🏗️ LEVEL 1: Base for ALL integration tests
@SpringBootTest
@ActiveProfiles("test")
@TestPropertySource(properties = {
    "spring.jpa.show-sql=false",
    "logging.level.org.springframework.web=WARN"
})
@TestConstructor(autowireMode = TestConstructor.AutowireMode.ALL)
public abstract class BaseIntegrationTest {

    // Nested @TestConfiguration for shared test beans
    @TestConfiguration
    static class BaseTestConfig {

        @Bean
        @Primary
        public Clock testClock() {
            // Fixed time for ALL tests
            return Clock.fixed(
                Instant.parse("2025-01-01T00:00:00Z"),
                ZoneOffset.UTC
            );
        }
    }
}

// 🏗️ LEVEL 2A: For WEB tests
public abstract class BaseWebTest extends BaseIntegrationTest {

    protected final MockMvc mockMvc;
    protected final ObjectMapper objectMapper;

    // Constructor injection (enabled by @TestConstructor)
    protected BaseWebTest(MockMvc mockMvc, ObjectMapper objectMapper) {
        this.mockMvc = mockMvc;
        this.objectMapper = objectMapper;
    }

    // Helper methods for all web tests
    protected String toJson(Object obj) throws Exception {
        return objectMapper.writeValueAsString(obj);
    }

    protected <T> T fromJson(String json, Class<T> clazz) throws Exception {
        return objectMapper.readValue(json, clazz);
    }
}

// 🏗️ LEVEL 2B: For DATABASE tests
@Transactional
@Rollback
public abstract class BaseDatabaseTest extends BaseIntegrationTest {

    protected final TestEntityManager entityManager;

    protected BaseDatabaseTest(TestEntityManager entityManager) {
        this.entityManager = entityManager;
    }

    // Helper methods for all database tests
    protected <T> T persistAndFlush(T entity) {
        T persisted = entityManager.persist(entity);
        entityManager.flush();
        return persisted;
    }

    protected void flushAndClear() {
        entityManager.flush();
        entityManager.clear();
    }
}

// 🎯 LEVEL 3: Your actual tests - simple and clean!
class UserControllerTest extends BaseWebTest {

    UserControllerTest(MockMvc mockMvc, ObjectMapper objectMapper) {
        super(mockMvc, objectMapper);
    }

    @Test
    void testCreateUser() throws Exception {
        mockMvc.perform(post("/users")
            .content(toJson(new User("test@example.com"))))
            .andExpect(status().isCreated());
    }
}

class OrderRepositoryTest extends BaseDatabaseTest {

    private final OrderRepository orderRepository;

    OrderRepositoryTest(TestEntityManager entityManager, OrderRepository orderRepository) {
        super(entityManager);
        this.orderRepository = orderRepository;
    }

    @Test
    void testSaveOrder() {
        Order order = new Order("ORD-123");
        persistAndFlush(order);

        assertThat(order.getId()).isNotNull();
        // Automatically rolled back!
    }
}
What is @TestConstructor?
@TestConstructor(autowireMode = ALL) enables constructor-based dependency injection in tests, replacing field injection with @Autowired.
// ❌ OLD WAY: Field injection
@SpringBootTest
class OldStyleTest {
    @Autowired
    private MockMvc mockMvc;  // Mutable field

    @Autowired
    private ObjectMapper objectMapper;  // Hidden dependency
}

// ✅ NEW WAY: Constructor injection
@SpringBootTest
@TestConstructor(autowireMode = TestConstructor.AutowireMode.ALL)
class ModernTest {
    private final MockMvc mockMvc;  // Immutable (final)
    private final ObjectMapper objectMapper;  // Immutable

    // Dependencies are EXPLICIT in constructor
    ModernTest(MockMvc mockMvc, ObjectMapper objectMapper) {
        this.mockMvc = mockMvc;
        this.objectMapper = objectMapper;
    }
}
Benefits:
- Immutability - Final fields → thread-safe
- Explicit dependencies - Clear what test needs
- Better testability - Can create test instance manually
- Null safety - Spring ensures all dependencies provided
Pattern #3: Test Slices Strategy
Problem: @SpringBootTest loads the entire application (slow).
Solution: Use test slices to load only what you need.
The Test Slice Decision Tree
graph TD
    A[What are you testing?] --> B{Controller?}
    A --> C{Repository?}
    A --> D{REST Client?}
    A --> E{Full workflow?}

    B -->|Yes| F[@WebMvcTest<br/>200-500ms]
    C -->|Yes| G[@DataJpaTest<br/>500-1000ms]
    D -->|Yes| H[@RestClientTest<br/>100-300ms]
    E -->|Yes| I[@SpringBootTest<br/>3-5 seconds]

    style F fill:#90EE90
    style G fill:#90EE90
    style H fill:#90EE90
    style I fill:#FFB6C1
Diagram: Decision tree for selecting the optimal Spring test slice annotation based on what you’re testing
Example: Controller Test
// ❌ SLOW: Loads entire application
@SpringBootTest
class UserControllerSlowTest {
    @Autowired TestRestTemplate restTemplate;
    // Loads: Controllers, Services, Repositories, Security, Database, etc.
    // Startup: 3-5 seconds
}

// ✅ FAST: Loads only web layer
@WebMvcTest(UserController.class)
class UserControllerFastTest {
    @Autowired MockMvc mockMvc;
    @MockBean UserService userService;  // Mock the service layer

    @Test
    void should_create_user_successfully() throws Exception {
        when(userService.createUser(any())).thenReturn(createdUser);

        mockMvc.perform(post("/api/users")
                .contentType(MediaType.APPLICATION_JSON)
                .content("""
                    {"name": "John", "email": "john@test.com"}
                """))
                .andExpect(status().isCreated())
                .andExpect(jsonPath("$.name").value("John"));
    }
}
// Startup: 200-500ms (10x faster!)
📊 Impact: 100 controller tests × 3 seconds saved = 5 minutes saved!
Example: Repository Test
// ✅ FAST: Loads only persistence layer
@DataJpaTest
class UserRepositoryTest {
    @Autowired UserRepository repo;
    @Autowired TestEntityManager em;

    @Test
    void should_find_users_by_email_domain() {
        em.persistAndFlush(new User("john@company.com"));
        em.persistAndFlush(new User("jane@company.com"));

        var users = repo.findByEmailDomain("company.com");

        assertThat(users).hasSize(2);
    }
}
// Startup: 500-1000ms
When to use @SpringBootTest:
- Testing complete workflows end-to-end
- Validating Spring configuration
- Testing with external integrations (mocked)
- Integration tests that require full context
When NOT to use @SpringBootTest:
- Unit testing controllers (use
@WebMvcTest) - Unit testing repositories (use
@DataJpaTest) - Unit testing REST clients (use
@RestClientTest) - Testing JSON serialization (use
@JsonTest)
Advanced Test Suite Optimization Techniques
Goal: Optimize test suite performance through parallel execution, configuration composition, and monitoring strategies.
Optimization #1: Parallel Test Execution
Run your tests concurrently across multiple threads to dramatically reduce total execution time. Spring’s context cache is thread-safe, allowing safe parallel execution when tests are properly isolated.
Performance impact:
Sequential: 200 tests × 100ms = 20 seconds
Parallel (4 threads): 200 tests ÷ 4 = 5 seconds (4x faster!)
How it works:
graph LR
    A[Test Suite] --> B[Thread 1:<br/>Test1, Test2]
    A --> C[Thread 2:<br/>Test3, Test4]
    A --> D[Thread 3:<br/>Test5, Test6]
    A --> E[Thread 4:<br/>Test7, Test8]

    B --> F[Results]
    C --> F
    D --> F
    E --> F

    style F fill:#90EE90
Diagram: Parallel test execution distributing tests across 4 threads for faster execution
Maven Configuration:
<plugin>
    <groupId>org.apache.maven.plugins</groupId>
    <artifactId>maven-surefire-plugin</artifactId>
    <version>3.0.0</version>
    <configuration>
        <!-- Enable parallel execution at class level -->
        <parallel>classes</parallel>
        <threadCount>4</threadCount>
        <perCoreThreadCount>true</perCoreThreadCount>
        <forkCount>2C</forkCount> <!-- forkCount: How many JVM processes to create - 2 × CPU cores -->
        <reuseForks>true</reuseForks> <!-- Reuse JVMs for speed -->
        <!-- JVM settings for test execution -->
        <argLine>
            -Xmx2048m
            -XX:MaxMetaspaceSize=512m
            -Dspring.test.context.cache.maxSize=64
        </argLine>
    </configuration>
</plugin>
JUnit 5 alternative: Create src/test/resources/junit-platform.properties:
# Enable parallel execution
junit.jupiter.execution.parallel.enabled=true

# Run test classes in parallel
junit.jupiter.execution.parallel.mode.default=concurrent
junit.jupiter.execution.parallel.mode.classes.default=concurrent

# Dynamic parallelism based on CPU cores
junit.jupiter.execution.parallel.config.strategy=dynamic
junit.jupiter.execution.parallel.config.dynamic.factor=1

# Or fixed number of threads
# junit.jupiter.execution.parallel.config.strategy=fixed
# junit.jupiter.execution.parallel.config.fixed.parallelism=4
Thread Safety Requirements
Parallel execution only works if tests don’t interfere with each other. Here are the patterns you need to follow:
✅ Safe Pattern #1: Instance Variables
Each test class instance is isolated, so instance variables are thread-safe:
@SpringBootTest
class SafeTest {
    private User testUser;  // ✅ Safe - each test instance is isolated
    private List<String> testData = new ArrayList<>();  // ✅ Safe

    @BeforeEach
    void setUp() {
        testUser = new User("test-" + UUID.randomUUID());
        testData.clear();
    }

    @Test
    void test1() {
        testData.add("data1");
        assertThat(testData).hasSize(1);  // ✅ Passes
    }

    @Test
    void test2() {
        testData.add("data2");
        assertThat(testData).hasSize(1);  // ✅ Passes - fresh instance
    }
}
✅ Safe Pattern #2: @Transactional for Database Tests
Spring automatically isolates each test in its own transaction:
@SpringBootTest
@Transactional  // Each test runs in isolated transaction
class DatabaseTest {
    @Autowired UserRepository userRepository;

    @Test
    void test1() {
        userRepository.save(new User("user1@test.com"));
        // Isolated from test2 - automatically rolled back
    }

    @Test
    void test2() {
        userRepository.save(new User("user2@test.com"));
        // Isolated from test1 - automatically rolled back
    }
}
✅ Safe Pattern #3: Immutable Static Data
Static data is safe when it cannot be modified:
@SpringBootTest
class ImmutableDataTest {
    private static final User TEMPLATE_USER = new User("template@test.com");  // ✅ Immutable
    private static final List<String> CATEGORIES = List.of("A", "B", "C");  // ✅ Unmodifiable

    @Test
    void test1() {
        User user = new User(TEMPLATE_USER.getEmail());  // Copy from immutable
        assertThat(user).isNotNull();
    }
}
❌ Unsafe Pattern: Static Mutable State
The problem arises when static fields CAN be modified—this causes race conditions:
class UnsafeTest {
    private static List<String> sharedList = new ArrayList<>();  // ❌ NOT thread-safe!

    @Test
    void test1() {
        sharedList.add("test1");  // ❌ Race condition!
    }

    @Test
    void test2() {
        sharedList.add("test2");  // ❌ Can interleave with test1
    }
}
How to Fix: Solution 1 - Use Thread-Safe Collections
If you must use static state, use concurrent collections and clean up after each test:
class SafeTest {
    private static ConcurrentHashMap<String, String> config = new ConcurrentHashMap<>();  // ✅ Thread-safe

    @Test
    void test1() {
        config.put("key1", "value1");  // ✅ Safe
    }

    @Test
    void test2() {
        config.put("key2", "value2");  // ✅ Safe
    }

    @AfterEach
    void cleanup() {
        config.clear();  // Clean after each test
    }
}
How to Fix: Solution 2 - Replace Static with Instance-Based (Better)
If possible, avoid static state entirely by using instance-based design:
// ❌ Problem: Service with static mutable state
public class ConfigService {
    private static Map<String, String> config = new HashMap<>();  // NOT thread-safe!

    public static void setConfig(String key, String value) {
        config.put(key, value);  // Race condition in parallel execution
    }
}

// ✅ Solution: Instance-based with prototype scope
@Component
@Scope(ConfigurableBeanFactory.SCOPE_PROTOTYPE)  // New instance per injection
public class ConfigService {
    private final Map<String, String> config = new HashMap<>();  // Each instance has its own state

    public void setConfig(String key, String value) {
        config.put(key, value);  // Isolated to this instance
    }
}
Thread Safety Checklist
- ✅ Use instance variables (not static mutable)
- ✅ Use @Transactional for database tests
- ✅ Reset state in @BeforeEach/@AfterEach
- ✅ Use immutable static data (final + unmodifiable)
- ✅ Use thread-safe collections if static needed
- ❌ Don’t mutate static state without synchronization
- ❌ Don’t share mutable objects across test methods
- ❌ Don’t rely on test execution order
Optimization #2: Configuration Composition
The Problem: Different tests need different configuration combinations. Each unique combination creates a new context:
// Test 1 needs: Clock + Security
@SpringBootTest
@Import({ClockConfig.class, SecurityConfig.class})
class UserServiceTest { }  // Creates context #1

// Test 2 needs: Clock + Cache
@SpringBootTest
@Import({ClockConfig.class, CacheConfig.class})
class OrderServiceTest { }  // Creates context #2

// Result: 2 different contexts = 2 × 5 seconds = 10 seconds startup
The Solution: Create modular building blocks, then use identical combinations across all tests.
Step 1: Create Modular Building Blocks
Break your test configuration into small, reusable pieces:
// Building Block #1: Clock
@TestConfiguration
public class ClockConfig {
    @Bean @Primary
    public Clock fixedClock() {
        return Clock.fixed(Instant.parse("2025-01-01T00:00:00Z"), ZoneOffset.UTC);
    }
}

// Building Block #2: Security
@TestConfiguration
public class SecurityConfig {
    @Bean @Primary
    public PasswordEncoder testPasswordEncoder() {
        return NoOpPasswordEncoder.getInstance();  // Fast for tests
    }

    @Bean @Primary
    public UserDetailsService testUserDetailsService() {
        return new InMemoryUserDetailsManager(
            User.withUsername("testuser").password("password").roles("USER").build()
        );
    }
}

// Building Block #3: Cache
@TestConfiguration
public class CacheConfig {
    @Bean @Primary
    public CacheManager testCacheManager() {
        return new NoOpCacheManager();  // Disable caching for predictable behavior
    }
}

// Building Block #4: External Services
@TestConfiguration
public class MockExternalServicesConfig {
    @Bean @Primary
    public EmailService emailService() {
        EmailService mock = mock(EmailService.class);
        when(mock.send(any())).thenReturn(true);
        return mock;
    }

    @Bean @Primary
    public PaymentGateway paymentGateway() {
        PaymentGateway mock = mock(PaymentGateway.class);
        when(mock.processPayment(any())).thenReturn(new PaymentResult(true, "TEST-123"));
        return mock;
    }
}
Step 2: Combine Building Blocks Consistently
You can mix and match building blocks, but consistent combinations are key to context reuse:
// Test 1: Needs Clock + Security
@SpringBootTest
@Import({ClockConfig.class, SecurityConfig.class})
class UserServiceTest {
    // Context Hash: ABC123
}

// Test 2: Clock + Security (SAME combination → Context REUSED!)
@SpringBootTest
@Import({ClockConfig.class, SecurityConfig.class})
class AuthServiceTest {
    // Context Hash: ABC123 → CACHE HIT! ⚡
}

// Test 3: Clock + Cache (DIFFERENT combination → New context)
@SpringBootTest
@Import({ClockConfig.class, CacheConfig.class})
class OrderServiceTest {
    // Context Hash: DEF456 → NEW CONTEXT
}

// Test 4: Clock + Cache (SAME as Test 3 → Context REUSED!)
@SpringBootTest
@Import({ClockConfig.class, CacheConfig.class})
class ProductServiceTest {
    // Context Hash: DEF456 → CACHE HIT! ⚡
}
Result: 4 tests, 2 unique contexts (50% reuse rate)
⚠️ Critical: Import Order Matters!
Spring considers different import orders as different configurations:
// Context 1
@Import({ClockConfig.class, SecurityConfig.class})  // Order: Clock, Security
class Test1 { }

// Context 2 (DIFFERENT - despite same configs!)
@Import({SecurityConfig.class, ClockConfig.class})  // Order: Security, Clock
class Test2 { }

// Different order → different hash → different context → 5 seconds wasted
Step 3: Maximize Reuse with Standard Bundles
Instead of mixing and matching, create ONE standard bundle for most tests:
Strategy A: Standard Configuration Bundle
// Create ONE standard combination for most tests
@TestConfiguration
@Import({
    ClockConfig.class,
    SecurityConfig.class,
    MockExternalServicesConfig.class,
    CacheConfig.class
})
public class StandardWebTestConfig {
    // Bundle everything most tests need
}

// All tests import the SAME bundle → 100% context reuse
@SpringBootTest
@Import(StandardWebTestConfig.class)
class ControllerTest1 { }

@SpringBootTest
@Import(StandardWebTestConfig.class)
class ControllerTest2 { }

@SpringBootTest
@Import(StandardWebTestConfig.class)
class ControllerTest3 { }
Strategy B: Base Test Class (Recommended)
Use inheritance to enforce consistent configuration:
@SpringBootTest
@Import(StandardWebTestConfig.class)
public abstract class BaseWebIntegrationTest {
    @Autowired protected Clock clock;
    @Autowired protected PasswordEncoder encoder;
    @Autowired protected EmailService emailService;
    @Autowired protected CacheManager cacheManager;

    // Common setup and helper methods
}

// All tests extend base → automatic context reuse
class ControllerTest1 extends BaseWebIntegrationTest { }
class ControllerTest2 extends BaseWebIntegrationTest { }
class ControllerTest3 extends BaseWebIntegrationTest { }
📊 Performance Impact:
BEFORE (mixing and matching):
├─ Test1: @Import({A, B})       5 seconds (new context)
├─ Test2: @Import({A, C})       5 seconds (new context)
├─ Test3: @Import({B, C})       5 seconds (new context)
├─ Test4: @Import({A})          5 seconds (new context)
└─ Test5: @Import({B})          5 seconds (new context)
Total: 25 seconds (5 unique contexts, 0% reuse)

AFTER (standard bundle):
├─ Test1: @Import(StandardConfig)  5 seconds (creates context)
├─ Test2: @Import(StandardConfig)  instant (reuses context)
├─ Test3: @Import(StandardConfig)  instant (reuses context)
├─ Test4: @Import(StandardConfig)  instant (reuses context)
└─ Test5: @Import(StandardConfig)  instant (reuses context)
Total: 5 seconds (80% faster, 80% reuse rate!)
Optimization #3: Performance Monitoring
Without metrics, you’re optimizing blind. Performance monitoring reveals which tests are slow and tracks your context reuse rate.
Step 1: Create Performance Test Listener
This listener automatically captures test execution times and context usage:
Complete PerformanceTestExecutionListener Implementation (click to expand)
public class PerformanceTestExecutionListener extends AbstractTestExecutionListener {

    private static final Map<String, Long> executionTimes = new ConcurrentHashMap<>();
    private static final List<TestMetric> allMetrics = new CopyOnWriteArrayList<>();

    @Override
    public void beforeTestMethod(TestContext testContext) {
        String key = getTestKey(testContext);
        executionTimes.put(key, System.currentTimeMillis());
    }

    @Override
    public void afterTestMethod(TestContext testContext) {
        String key = getTestKey(testContext);
        long duration = System.currentTimeMillis() - executionTimes.remove(key);

        allMetrics.add(new TestMetric(
            testContext.getTestClass().getSimpleName(),
            testContext.getTestMethod().getName(),
            duration,
            testContext.getApplicationContext().hashCode()
        ));

        // Warn about slow tests
        if (duration > 1000) {
            System.err.printf("⚠️ SLOW TEST: %s took %dms%n", key, duration);
        }
    }

    @Override
    public void afterTestClass(TestContext testContext) {
        if (isLastTestClass()) {
            printPerformanceReport();
        }
    }

    private String getTestKey(TestContext context) {
        return context.getTestClass().getSimpleName() + "#" +
               context.getTestMethod().getName();
    }

    private boolean isLastTestClass() {
        // Implement logic to detect last test class
        return allMetrics.size() >= expectedTestCount;
    }

    private void printPerformanceReport() {
        System.out.println("\n📊 TEST PERFORMANCE REPORT");
        System.out.println("=".repeat(50));
        System.out.printf("Total tests: %d%n", allMetrics.size());
        System.out.printf("Average time: %.2fms%n",
            allMetrics.stream().mapToLong(m -> m.duration).average().orElse(0));
        System.out.printf("Total time: %.2fs%n",
            allMetrics.stream().mapToLong(m -> m.duration).sum() / 1000.0);

        // Top 5 slowest tests
        System.out.println("\n🐌 Top 5 Slowest Tests:");
        allMetrics.stream()
            .sorted((a, b) -> Long.compare(b.duration, a.duration))
            .limit(5)
            .forEach(m -> System.out.printf("  %s#%s: %dms%n",
                m.className, m.methodName, m.duration));

        // Context reuse analysis
        long uniqueContexts = allMetrics.stream()
            .map(m -> m.contextHashCode)
            .distinct()
            .count();

        double reuseRate = (1 - (double) uniqueContexts / allMetrics.size()) * 100;

        System.out.println("\n🔄 Context Reuse Analysis:");
        System.out.printf("  Unique contexts: %d%n", uniqueContexts);
        System.out.printf("  Context reuse rate: %.1f%%%n", reuseRate);

        if (reuseRate > 90) {
            System.out.println("  ✅ Excellent context reuse!");
        } else if (reuseRate > 70) {
            System.out.println("  ⚠️ Good, but room for improvement");
        } else {
            System.out.println("  ❌ Poor context reuse - needs optimization");
        }
    }

    static class TestMetric {
        final String className, methodName;
        final long duration;
        final int contextHashCode;

        TestMetric(String className, String methodName, long duration, int contextHashCode) {
            this.className = className;
            this.methodName = methodName;
            this.duration = duration;
            this.contextHashCode = contextHashCode;
        }
    }
}
Step 2: Register the Listener
Create src/test/resources/META-INF/spring.factories:
org.springframework.test.context.TestExecutionListener=\
  com.example.PerformanceTestExecutionListener
Step 3: Run Tests and Analyze Results
mvn clean test
Example output:
⚠️ SLOW TEST: OrderProcessingTest#testBulkOrders took 2340ms
⚠️ SLOW TEST: UserServiceTest#testComplexWorkflow took 1850ms

📊 TEST PERFORMANCE REPORT
==================================================
Total tests: 150
Average time: 245ms
Total time: 36.75s

🐌 Top 5 Slowest Tests:
  OrderProcessingTest#testBulkOrders: 2340ms
  UserServiceTest#testComplexWorkflow: 1850ms
  PaymentServiceTest#testRetryLogic: 1420ms
  EmailServiceTest#testBatchSending: 1280ms
  ReportServiceTest#testLargeDataset: 1150ms

🔄 Context Reuse Analysis:
  Unique contexts: 8
  Context reuse rate: 94.7%
  ✅ Excellent context reuse!
Interpreting Metrics
Use this table to understand what your metrics mean:
| Metric | Good | Warning | Action Needed |
|---|---|---|---|
| Context reuse rate | >90% | 70-90% | <70% |
| Average test time | <300ms | 300-800ms | >800ms |
| Unique contexts | <10 | 10-20 | >20 |
Action plan based on metrics:
Context reuse rate < 70%?
→ Check for unique @MockBean combinations
→ Create shared @TestConfiguration
→ Verify consistent @Import orders

Average test time > 800ms?
→ Use test slices (@WebMvcTest, @DataJpaTest)
→ Check if @SpringBootTest is necessary
→ Optimize slowest tests from "Top 5"

Unique contexts > 20?
→ Too many different configurations
→ Create standard configuration bundles
→ Use base test classes
Optimization #4: Lazy Bean Initialization
The Problem: Expensive beans are created during context startup, even if only a few tests use them:
@TestConfiguration
public class TestConfig {
    @Bean
    public ExpensiveService expensiveService() {
        // Takes 2 seconds to initialize
        // Only 20% of tests use it
        // But ALL tests pay the 2-second cost!
        return new ExpensiveService();
    }
}
The Solution: Mark expensive beans as @Lazy to defer initialization until first use:
@TestConfiguration
public class OptimizedTestConfig {

    @Bean
    @Lazy  // Only initialize when first accessed
    public ExpensiveService expensiveService() {
        // Takes 2 seconds, but only loaded if test needs it
        return new ExpensiveService();
    }

    @Bean
    @Lazy
    public SlowDatabaseClient slowClient() {
        // Only created if test actually needs it
        return new SlowDatabaseClient();
    }

    @Bean  // NOT lazy - needed by all tests
    public FastUtilityService utilityService() {
        return new FastUtilityService();  // < 100ms
    }
}
Performance Impact
Scenario: 100 tests share same context, 20 tests use ExpensiveService (2s startup)

WITHOUT @Lazy:
├─ Context creation: 2 seconds (service loaded immediately)
├─ All 100 tests pay this 2-second cost
└─ Total overhead: 2 seconds

WITH @Lazy:
├─ Context creation: instant (service NOT loaded)
├─ First test using it: 2 seconds (loaded on first access)
├─ Remaining 19 tests: instant (reuse loaded instance)
└─ Total overhead: 2 seconds for 20 tests

For the 80 tests that DON'T use it:
├─ WITHOUT @Lazy: 2 seconds wasted
├─ WITH @Lazy: 0 seconds (never loaded)
└─ Net savings: 0 seconds (same total time)

BUT if those 80 tests create 4 DIFFERENT contexts:
├─ WITHOUT @Lazy: 4 contexts × 2 seconds = 8 seconds wasted
├─ WITH @Lazy: 4 contexts × 0 seconds = 0 seconds
└─ Savings: 8 seconds!
When to Use @Lazy (click to expand)
✅ Good candidates:
- External service clients (S3, Email, Payment gateways)
- Heavy data processors
- Report generators
- Large object mappers
- Database migration tools
❌ Don’t use @Lazy for:
- Beans used by >50% of tests (minimal benefit)
- Beans with fast initialization (<100ms)
- Beans required for context startup
Expert-Level Testing Strategies for Complex Applications
Goal: Learn @ContextHierarchy and thread-safe patterns for enterprise multi-module applications. Note: Optional—skip if you have <50 test classes.
Expert Pattern: @ContextHierarchy for Multi-Module Apps
What is @ContextHierarchy?
@ContextHierarchy creates a parent-child relationship between Spring contexts. The parent context contains expensive shared infrastructure (database, caching), while child contexts contain lightweight module-specific beans.
Key Benefit: Parent context created ONCE and reused by all child contexts.
Real-World Scenario: E-Commerce Multi-Module App
// 🏗️ Parent: Core infrastructure (EXPENSIVE - 5 seconds)
@Configuration
@EnableJpaRepositories(basePackages = "com.example.repository")
class CoreInfrastructureConfig {
    @Bean
    public DataSource dataSource() {
        // Takes 3 seconds to initialize connection pool
        return new HikariDataSource();
    }

    @Bean
    public CacheManager cacheManager() {
        // Takes 2 seconds to initialize cache
        return new CaffeineCacheManager();
    }
}

// 🧩 Child 1: Order module (CHEAP - < 1 second)
@Configuration
class OrderModuleConfig {
    @Bean
    public OrderService orderService() {
        return new OrderService();  // Fast
    }

    @Bean
    public PaymentClient paymentClient() {
        return new PaymentClient();  // Fast
    }
}

// 🧩 Child 2: Inventory module (CHEAP - < 1 second)
@Configuration
class InventoryModuleConfig {
    @Bean
    public InventoryService inventoryService() {
        return new InventoryService();  // Fast
    }

    @Bean
    public WarehouseClient warehouseClient() {
        return new WarehouseClient();  // Fast
    }
}
Using @ContextHierarchy
// Test 1: Order module tests
@ContextHierarchy({
    @ContextConfiguration(
        name = "parent",
        classes = CoreInfrastructureConfig.class  // Shared parent
    ),
    @ContextConfiguration(
        name = "child",
        classes = OrderModuleConfig.class  // Order-specific
    )
})
class OrderServiceTest {
    @Autowired OrderService orderService;  // From child
    @Autowired DataSource dataSource;       // From parent (available!)

    // Startup: 5s (parent) + 1s (child) = 6s (FIRST TIME)
}

// Test 2: More order module tests
@ContextHierarchy({
    @ContextConfiguration(classes = CoreInfrastructureConfig.class),  // SAME parent
    @ContextConfiguration(classes = OrderModuleConfig.class)          // SAME child
})
class OrderIntegrationTest {
    // Startup: INSTANT (both parent and child reused!)
}

// Test 3: Inventory module tests
@ContextHierarchy({
    @ContextConfiguration(classes = CoreInfrastructureConfig.class),  // REUSED parent!
    @ContextConfiguration(classes = InventoryModuleConfig.class)      // NEW child
})
class InventoryServiceTest {
    @Autowired InventoryService inventoryService;  // From child
    @Autowired CacheManager cacheManager;          // From parent (available!)

    // Startup: 1s (only new child created, parent REUSED)
}
📊 Performance Comparison:
WITHOUT @ContextHierarchy (separate contexts):
├─ OrderServiceTest:      6s (full context)
├─ OrderIntegrationTest:  6s (full context)
├─ InventoryServiceTest:  6s (full context)
└─ Total: 18 seconds

WITH @ContextHierarchy:
├─ OrderServiceTest:      6s (parent + child created)
├─ OrderIntegrationTest:  instant (both reused)
├─ InventoryServiceTest:  1s (parent reused, new child)
└─ Total: 7 seconds (61% faster!)
Context Cache Statistics
size = 3
  → CoreInfrastructureConfig (parent)
  → OrderModuleConfig (child)
  → InventoryModuleConfig (child)

parentContextCount = 1
  → CoreInfrastructureConfig is the parent

hitCount = 4
  → CoreInfrastructureConfig reused 3 times
  → OrderModuleConfig reused 1 time

missCount = 3
  → Each config created once
Decision: Hierarchy vs. Shared Base Class
// ❌ Don't use @ContextHierarchy for this (overkill)
// Simple app with shared config → use base class instead

@SpringBootTest
@Import(StandardTestConfig.class)
abstract class BaseTest { }  // ✅ SIMPLER, use this!

class Test1 extends BaseTest { }
class Test2 extends BaseTest { }

// ✅ Use @ContextHierarchy for this
// Complex multi-module app with expensive shared infra

@ContextHierarchy({
    @ContextConfiguration(classes = ExpensiveSharedConfig.class),  // 5+ seconds
    @ContextConfiguration(classes = Module1Config.class)            // < 1 second
})
class Module1Test { }

@ContextHierarchy({
    @ContextConfiguration(classes = ExpensiveSharedConfig.class),  // REUSED
    @ContextConfiguration(classes = Module2Config.class)            // < 1 second
})
class Module2Test { }
Thread Safety Patterns for Parallel Execution
Pattern #1: TestContainers Singleton (Thread-Safe by Design)
@SpringBootTest
@Testcontainers
class ContainerTest {
    @Container
    static PostgreSQLContainer<?> postgres = new PostgreSQLContainer<>("postgres:15");

    @DynamicPropertySource
    static void properties(DynamicPropertyRegistry registry) {
        registry.add("spring.datasource.url", postgres::getJdbcUrl);
        registry.add("spring.datasource.username", postgres::getUsername);
        registry.add("spring.datasource.password", postgres::getPassword);
    }

    // ✅ Safe because:
    // - Container manages internal thread safety
    // - Tests use @Transactional for data isolation
    // - Each test gets isolated transaction even with shared DB

    @Test
    @Transactional
    void test1() {
        userRepository.save(new User("user1@test.com"));
        // Isolated transaction
    }

    @Test
    @Transactional
    void test2() {
        userRepository.save(new User("user2@test.com"));
        // Different isolated transaction
    }
}
Pattern #2: Immutable Test Data
@SpringBootTest
class ImmutableDataTest {
    // ✅ Immutable = thread-safe by nature
    private static final User TEMPLATE_USER = new User("template@test.com");
    private static final List<String> CATEGORIES = List.of("A", "B", "C");  // Unmodifiable
    private static final Map<String, String> CONFIG = Map.of("key", "value");  // Unmodifiable

    @Test
    void test1() {
        User user = new User(TEMPLATE_USER.getEmail());  // Copy from immutable
        assertThat(user).isNotNull();
    }

    @Test
    void test2() {
        List<String> categories = new ArrayList<>(CATEGORIES);  // Defensive copy
        categories.add("D");
        assertThat(categories).hasSize(4);
    }
}
Pattern #3: ReflectionTestUtils for Dynamic Configuration
@Service
public class RateLimiter {
    @Value("${rate.limit.max-requests:100}")
    private int maxRequests;

    private final Map<String, Integer> requestCounts = new ConcurrentHashMap<>();

    public boolean allowRequest(String userId) {
        int count = requestCounts.getOrDefault(userId, 0);
        if (count >= maxRequests) {
            return false;
        }
        requestCounts.put(userId, count + 1);
        return true;
    }
}

@SpringBootTest
class RateLimiterTest {
    @Autowired RateLimiter rateLimiter;

    @Test
    void testDifferentRateLimits() {
        // Test with limit of 5
        ReflectionTestUtils.setField(rateLimiter, "maxRequests", 5);

        for (int i = 0; i < 5; i++) {
            assertThat(rateLimiter.allowRequest("user1")).isTrue();
        }
        assertThat(rateLimiter.allowRequest("user1")).isFalse();

        // Reset internal state
        ReflectionTestUtils.setField(
            rateLimiter,
            "requestCounts",
            new ConcurrentHashMap<>()
        );

        // Test with limit of 10
        ReflectionTestUtils.setField(rateLimiter, "maxRequests", 10);

        for (int i = 0; i < 10; i++) {
            assertThat(rateLimiter.allowRequest("user2")).isTrue();
        }
        assertThat(rateLimiter.allowRequest("user2")).isFalse();
    }

    @AfterEach
    void resetToDefault() {
        ReflectionTestUtils.setField(rateLimiter, "maxRequests", 100);
        ReflectionTestUtils.setField(rateLimiter, "requestCounts", new ConcurrentHashMap<>());
    }
}
💡 Advanced ReflectionTestUtils Usage:
Complete Advanced ReflectionTestUtils Patterns (click to expand)
@Service
public class ComplexService {
    @Autowired
    private UserRepository userRepository;  // Private field

    private EmailValidator emailValidator = new EmailValidator();  // Private field

    public void processUser(String email) {
        if (validateEmailInternal(email)) {
            userRepository.save(new User(email));
        }
    }

    private boolean validateEmailInternal(String email) {  // Private method
        return emailValidator.isValid(email);
    }
}

@ExtendWith(MockitoExtension.class)
class ComplexServiceTest {
    @Mock UserRepository mockRepository;
    @InjectMocks ComplexService service;

    // Pattern 1: Replace private field with test double
    @Test
    void testWithCustomValidator() {
        EmailValidator customValidator = mock(EmailValidator.class);
        when(customValidator.isValid(anyString())).thenReturn(true);

        ReflectionTestUtils.setField(
            service,
            "emailValidator",
            customValidator
        );

        service.processUser("test@example.com");

        verify(mockRepository).save(any(User.class));
        verify(customValidator).isValid("test@example.com");
    }

    // Pattern 2: Invoke private method directly (use sparingly!)
    @Test
    void testPrivateMethodDirectly() {
        Boolean result = ReflectionTestUtils.invokeMethod(
            service,
            "validateEmailInternal",
            "test@example.com"
        );

        assertThat(result).isTrue();
    }

    // Pattern 3: Read private field value
    @Test
    void testGetPrivateFieldValue() {
        EmailValidator validator = (EmailValidator) ReflectionTestUtils.getField(
            service,
            "emailValidator"
        );

        assertThat(validator).isNotNull();
    }
}
⚠️ When to use ReflectionTestUtils:
- ✅ Testing different @Value configurations without context reload
- ✅ Injecting mocks into private @Autowired fields (legacy code)
- ✅ Modifying rate limits, timeouts, or thresholds for edge cases
- ⚠️ Reading private field values (usually indicates missing getter)
- ❌ Testing private methods as primary strategy (test public API instead)
Key Takeaways & What’s Next
Essential Principles from Part 2
- Maximize context reuse - Share configurations via
@TestConfigurationinstead of inline@MockBean - Use test slices - Replace
@SpringBootTestwith@WebMvcTest/@DataJpaTestfor 5-10x speedup - Avoid @DirtiesContext - Use
@Transactionalfor database cleanup,ReflectionTestUtilsfor config changes - Enable parallel execution - Configure Maven Surefire for 2-4x faster test suites (verify thread-safety first)
- Monitor context cache - Target >90% reuse rate via cache statistics logging
- Optimize bean initialization - Apply
@Lazyto expensive beans only used by subset of tests
Coming Up in Part 3: Layer-by-Layer Testing Mastery
Now that you’ve mastered context management and achieved 10x performance improvements, you’re ready to dive deep into each application layer:
- Web Layer: Advanced MockMvc patterns, REST API testing, security testing
- Data Layer: @DataJpaTest mastery, @Sql scripts, TestContainers strategies
- Service Layer: Business logic testing, transaction boundaries, complex workflows, error handling strategies
Resources & Links
Essential Documentation
- Spring Test Context Management
- JUnit 5 Parallel Execution
- Spring Boot Testing Features
- Testcontainers Official Docs
- Spring Test Context Caching
Companion Content
Last updated: October 2025 | Spring Boot 3.x + Java 21+
Remember: Every second saved in test execution is multiplied across your entire team and CI/CD pipeline. A 10x improvement in test performance can save hours of developer time daily. Start with the quick wins, measure your improvements, and iterate!